Draping- Torso Foundation Dress


Preparing Dress Form
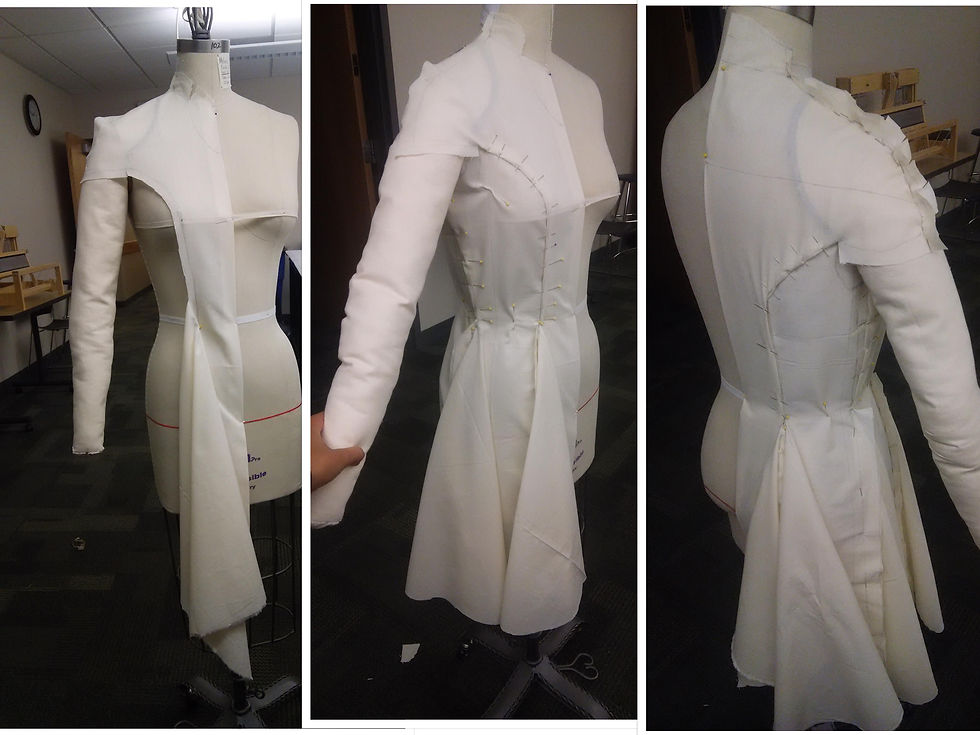
When first preparing the dress form one must pin all style lines that will be part of the final design. For this particular project I had to add the princess seam lines on both the front and back of the dress form.
For aesthetic purposes it is important for the princess lines to end optically in the same place for both front and back style lines.
Also a pin must be placed 3/8" under the neck seam line as a guide. the armhole ridge has also been marked with pins. All of these style lines can be marked with either draping tape or with tailors pins.
Draping the muslin
After preparing the muslin, one must prepare the right length and width of fabric to create the new design. For this dress I was creating a torso foundation basic dress but with princess seams, and flare extending out from the waistline. This dress does not have a waistline seam. When one is about to start draping you must prepare the muslin by adding guidelines. For the front of the dress I added a line coming down from the 3/8" mark of the neck 7 1/4" down to mark where the bust-line would be. This is very important to create a balanced design. I then add a line 4" down from the back neckline to prepare the back piece for draping. Ensure when cutting out the muslin to drape, that the lengthwise grain has been straightened out. Tear the seams of all the sides of the fabric you are using, then use an L square to true/ straighten out all edges to 90 degree angles.
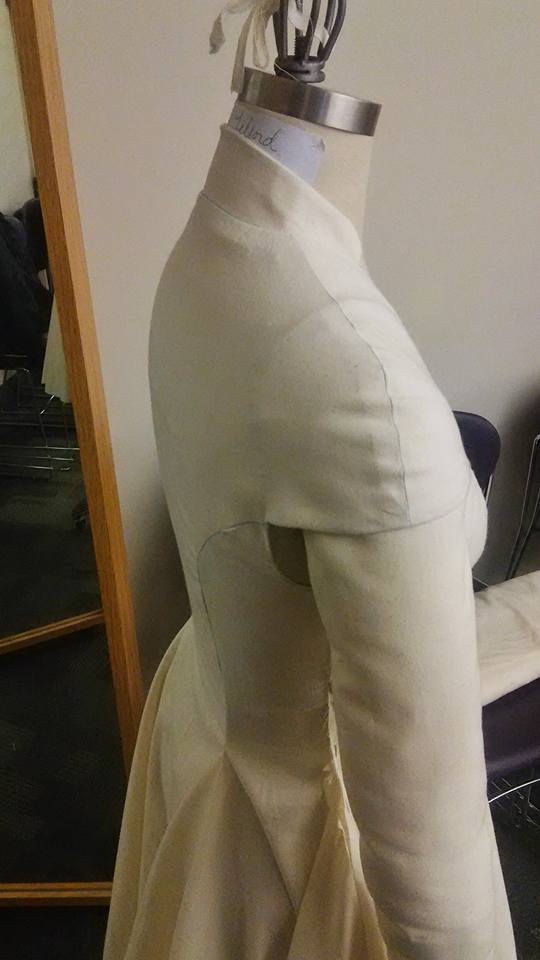
Lastly place fabric on dress-form first starting at the neckline. Add pins at key points such as the neck/ shoulder intersection then work your way down counterclockwise. add a pin at the bust-point. Pin in the shoulder seam. Add ease only to the front side panel. And draw a line with the pencil to mark the princess seam. Also add in the neckline. At this point you can draw in the desired neckline. do nut cut away fabric yet from the neckline.
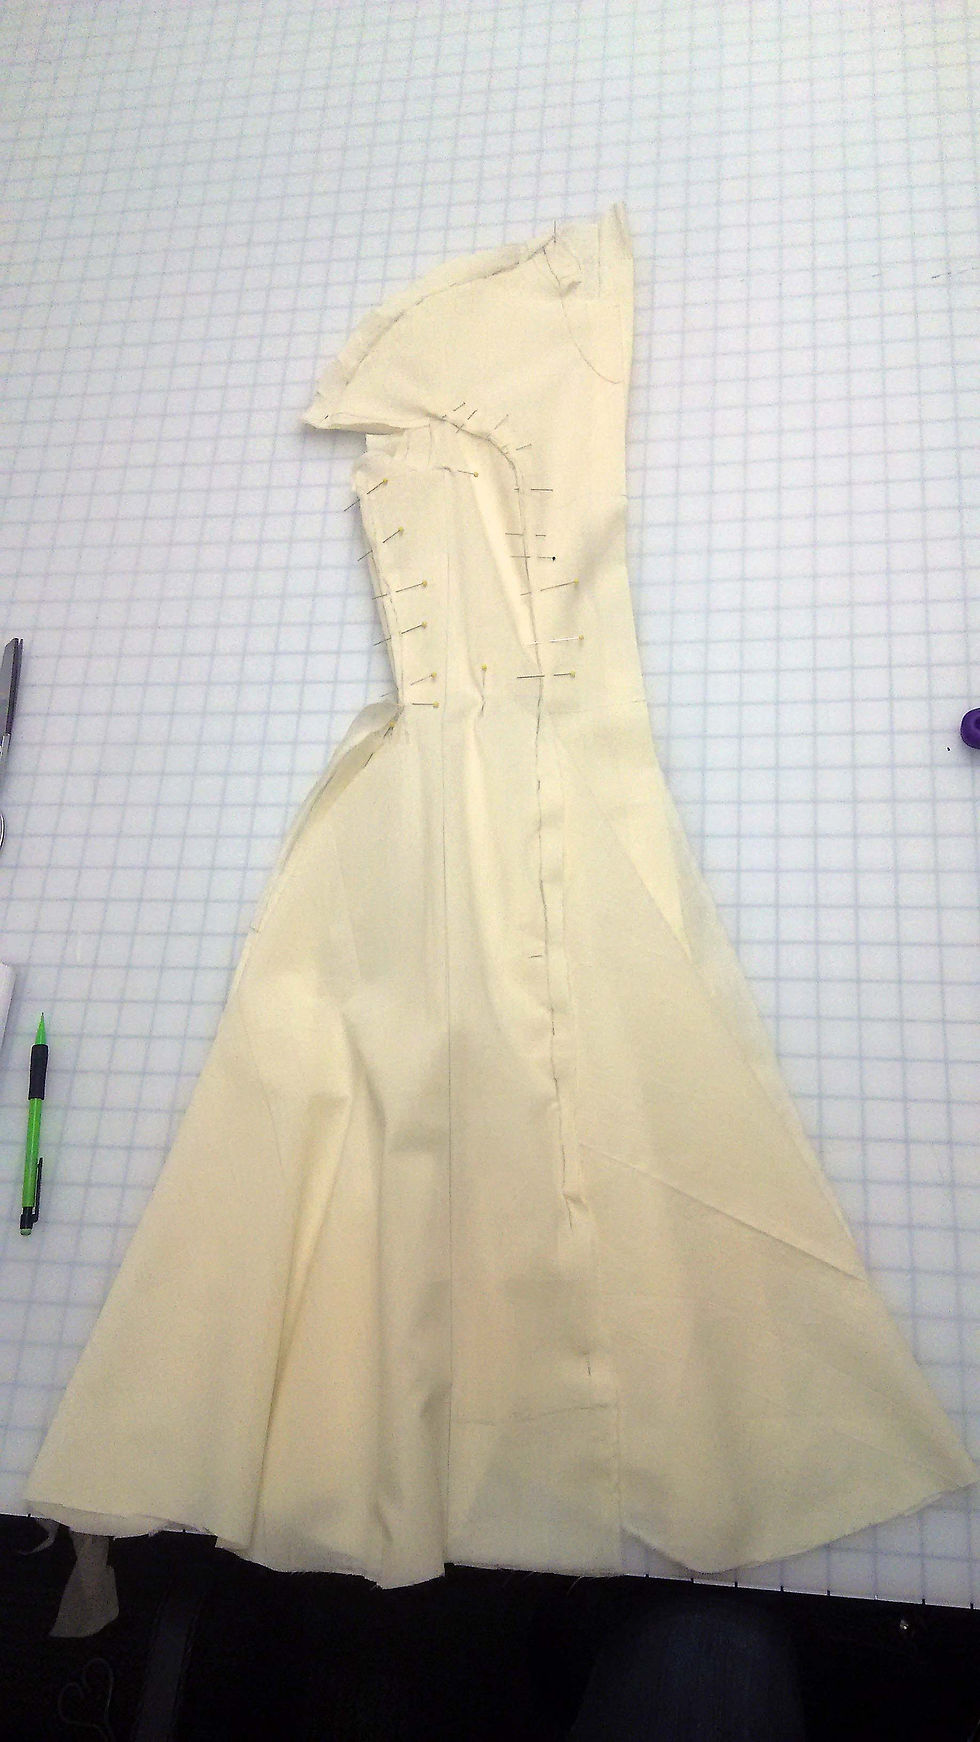
When you are finished with the front drape, you can begin the back and pin all pieces together as if they were sewn, removing all pins that would attach it to the dress form. while pinning it all together make sure you have added appropriate ease. 1/2" on each side of the side seams and at leas 1/4" on each side on the waist. Make notches at the waist and HBL lines to for sewing purposes later.
Remove finished draped garment, but do not do so until you have added side ease and have pinned the entire garment together at the side seams and shoulder.
Creating a Paper Pattern
Once you have removed the draped garment iron it out, remove pins. Make sure you have marked all important points where seams meet. There are various ways to transfer markings to the paper, one way is using tracing paper and placing muslin on top of pattern paper. If you do this make sure that you have made straight guidelines to match bust-lines/ grain-lines.
My preferred method (depending on the project) is to place the muslin underneath the pattern paper and hold it in place with double sided tape, then to transfer all markings, ensuring it is an exact replica of the draped garment.
when creating the paper pattern, make sure to true necklines, armscyes, and all seams that match together. for this project it was very important to measure and true where the notches on the skirt were placed, to ensure the dress all matched up and lined up perfectly while sewing. I made sure that on the front & back princess seams, I had marked 2 inches above and below the broadest part of the princess seam to ensure it was all eased in at the correct spot.
True all curves on the pattern, add Seam allowance: 1/2" all seams, 1/4" on neckline and armscye seams since it would be encased in an all in one facing.
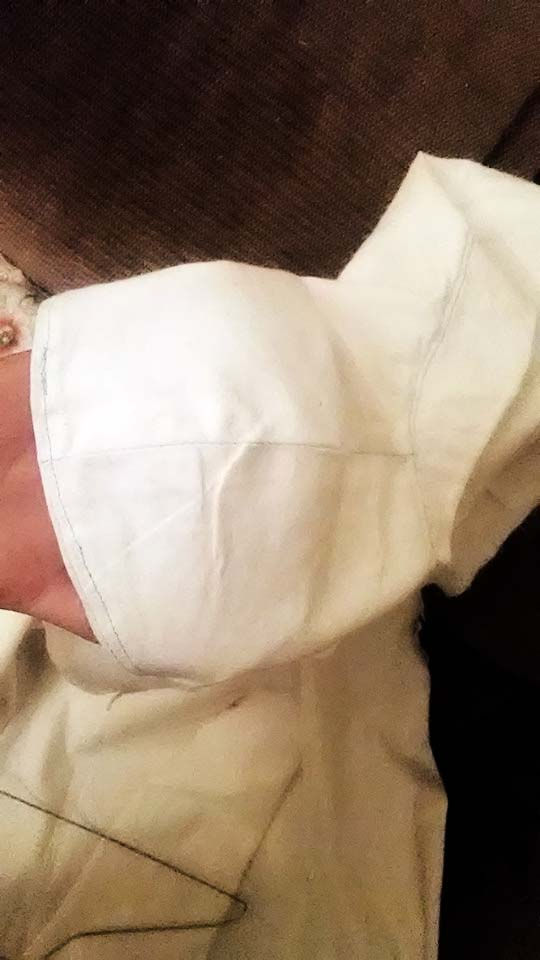
This dress included a built in sleeve, so I had to draft an all in one facing.
Muslin Sample
Construction sequence
1) Cut out all pieces in muslin
2) Sew front side panels to center front of dress. mark all notches.
3) Sew back side panels to center back pieces.
4) Sew shoulder seams, and add all in one facing. Add under-stitching to all seams that may need it.
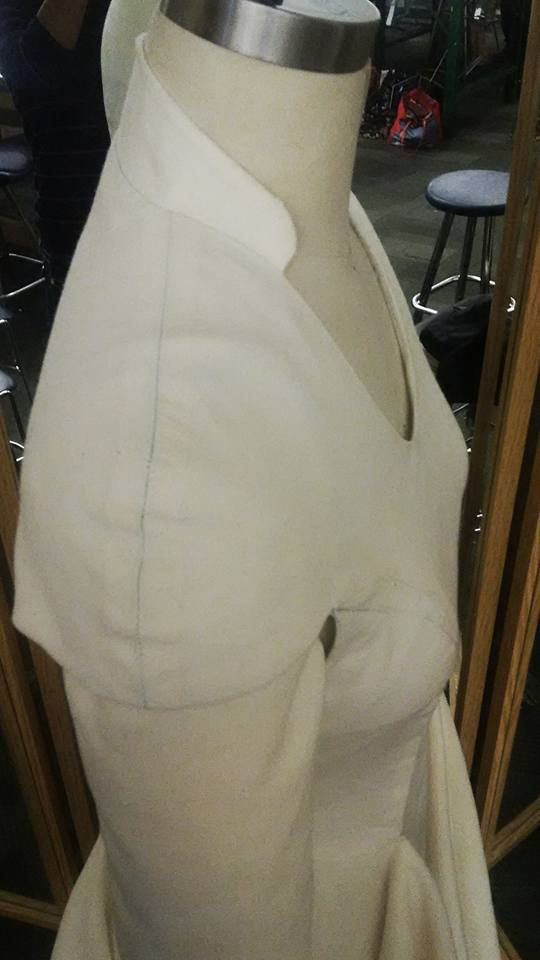
5) Construct mandarin collar, add appropriate interfacing.
6) Iron all seams after sewing them.
7) Sew on mandarin collar, flip entire thing to right side.
8) Sew neckline last, because or else you won't be able to flip it inside out if sew while you sew the all in one facing.
Mid Evaluation
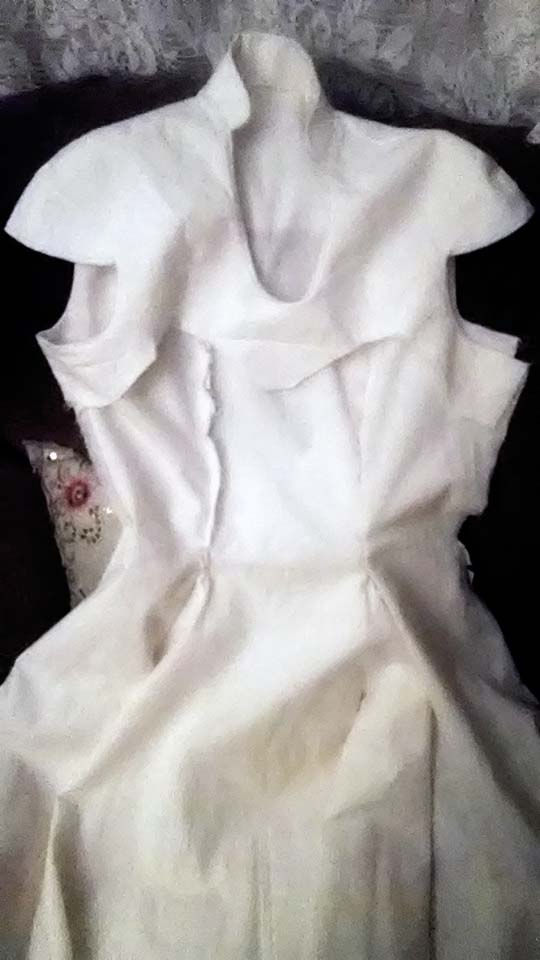
The dress was fitting very well, the only problems I recognized was that the facing was pulling the entire design upwards, since it created more bulk with the interfacing. I had to alter my facing piece to make it not cause pulling on the inside of the garment. Because of the pulling the curve of the princess seam seamed to have raised. I had to change the angle of that style-line. There was also a small problem with the neckline, since it has a side zipper I had to open up the neckline a bit more to ensure the model could fit her head through the hole.
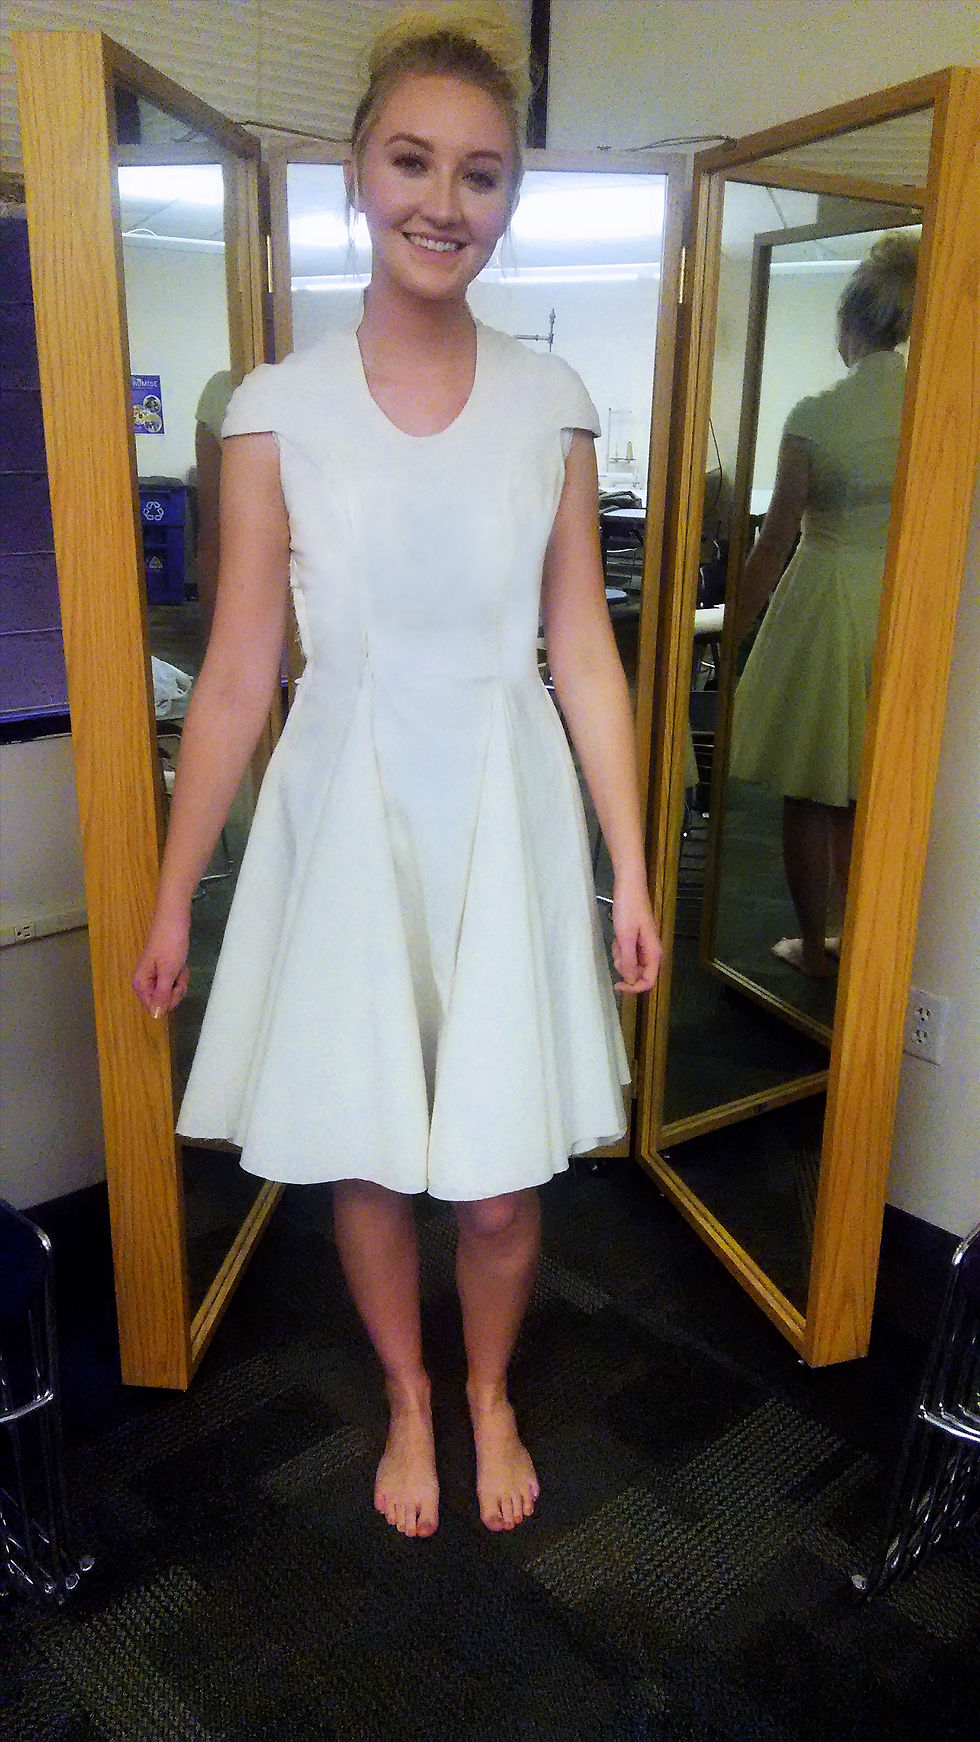
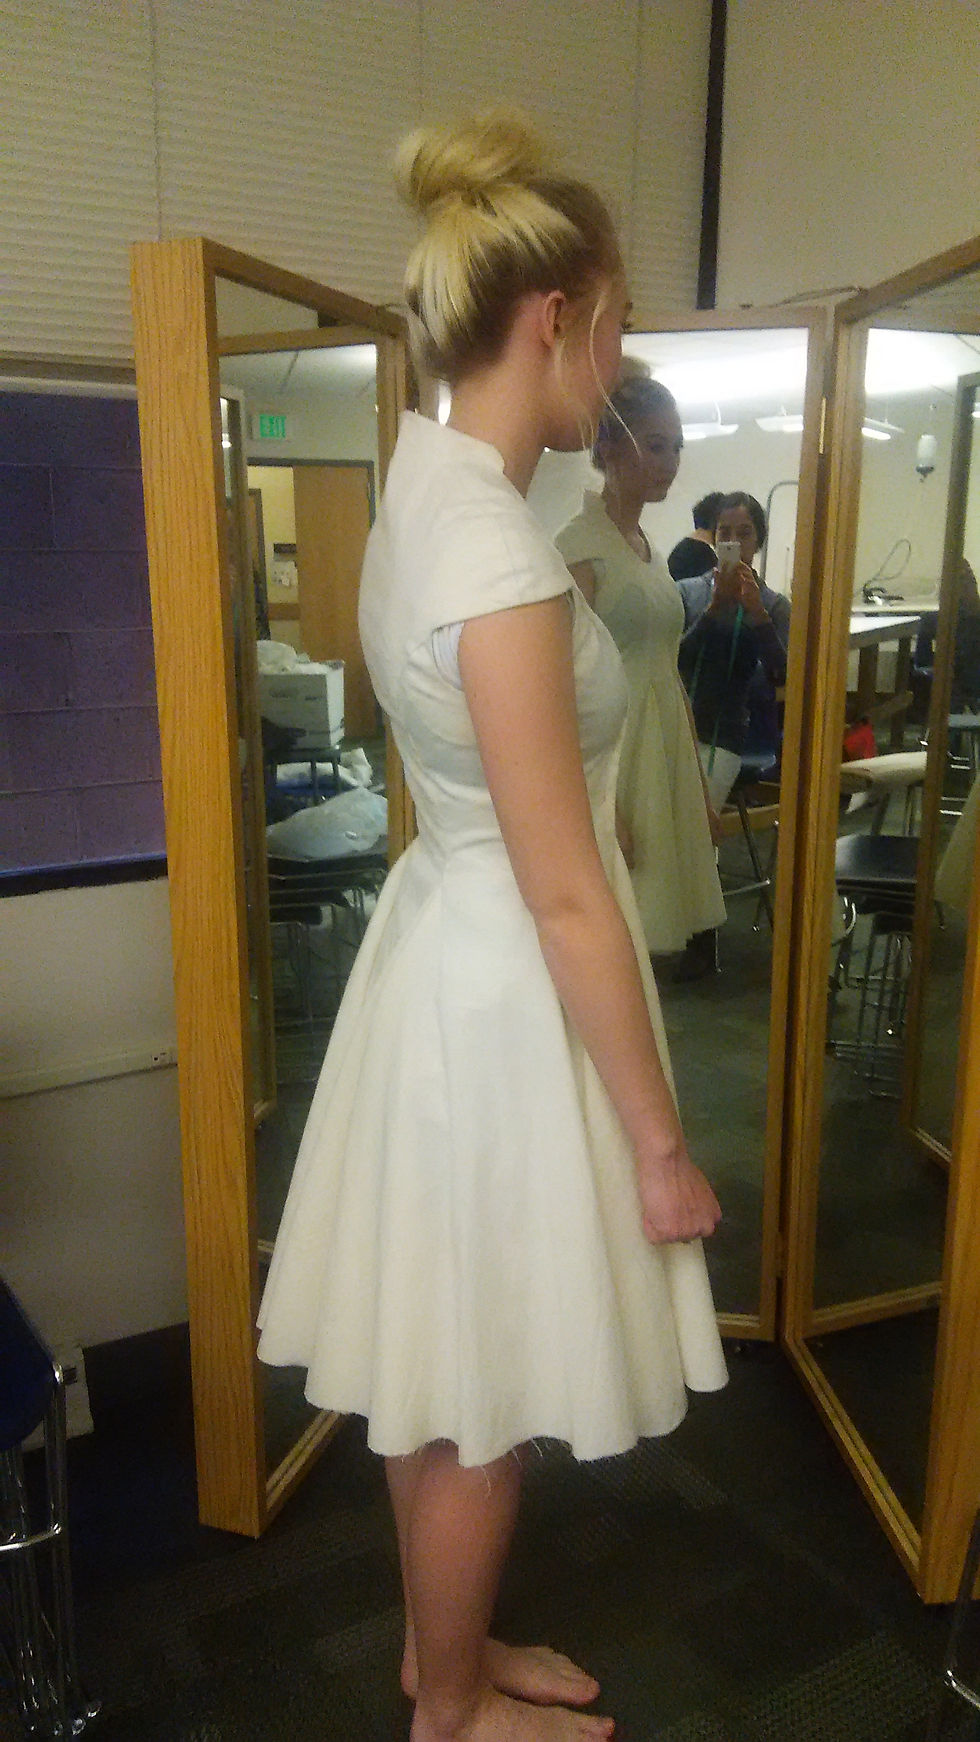
On the good side, I was overall very satisfied that the design was exactly what I was aiming for. It also had a perfect fit on the back, and the flare was well balanced and twirled in a very lovely manner.
Revising Pattern
To fix the previous problems, I added some width and length to the facing to release the pulling, I also reshaped the facing curve where it goes over the bust. The neckline I fitted on a fit model and marked how much wider I needed to make it. And lastly I changed the curve of the princess seam over the bust, so that it would be more aesthetically appealing.
Revised Muslin/Final Pattern Set
Yes the final patterns were successful, because I didn't have to alter any major parts of the design, it fit very well, and my model felt very comfortable in the dress.
If I were to re-do the project, I would pay more attention and create a specific plan for the construction steps. It was very hard to figure out how to turn the garment to the right side, specially when I had a side zipper and a narrow neckline that was enclosed with an all in one facing. If I were to do it again, I would experiment with sewing the side seam under built in sleeve, and see if there is a way I could construct it without having to leave the neckline for last.
I feel that I gave a full effort on this project, I worked 3 hours after class just to finish draping some last details of the flare, and honestly I am very blessed that what I imagined in my mind is exactly what resulted in my final project.
I want to practice creating facings with the right angle to go over the bust, I have had that problem more than once on previous projects. I also want to change the way I curve princess lines.
When evaluating our projects we have 2 other students evaluate our work, and we have to evaluate our own work once again. We measure the seams that will be attached to make sure they are trued. Doing this helped me to find tiny flaws in the length of one of the sides of my dress. This process is necessary, because there is always room for error, so having an extra set of eyes to examine the quality of our work is very useful.
Future Application
This class has been enormously helpful, this semester I was creating my graduation collection, and I was able to drape almost 4 of my projects for my graduation during this class as an assignment. There are many deigns that I have in my mind that would not come out as perfect if I hadn't learned how to drape. There is only so much one can do with flat patterning. I enjoy both methods and have found I use both equally in my work. This class has helped me create the visions that I have in my mind.
I will always use this method in my future design career. I hope to start my own company, and will be creating sample garments, draping will help to create the patterns for further production purposes.